FolderIco is a powerful tool that lets you quickly change default folder icons to something more meaningful and visually distinct. By default, FolderIco provides a variety of predefined icons accessible via the Explorer right-click menu.
If you want to personalize this menu further by adding or replacing icons, follow the steps below.
Step 1: Open the FolderIco main window
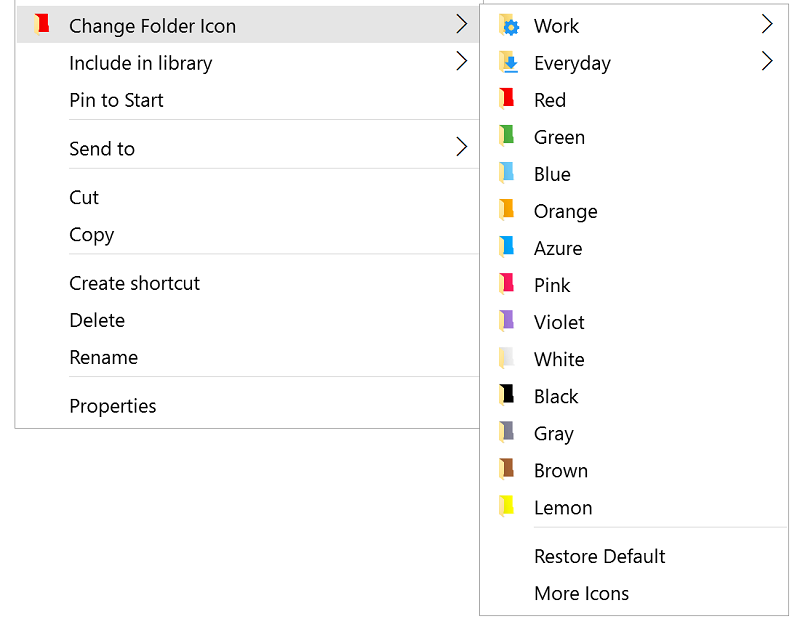
- Right-click any folder.
- In the Explorer context menu, select Change Folder Icon to view the available icons.
- Click More icons at the bottom of the list to open the FolderIco main window.
Alternatively, you can start FolderIco from the Start button.
Step 2: Add custom icons to FolderIco
Before adding new icons to the Explorer menu, they must first be imported into FolderIco.
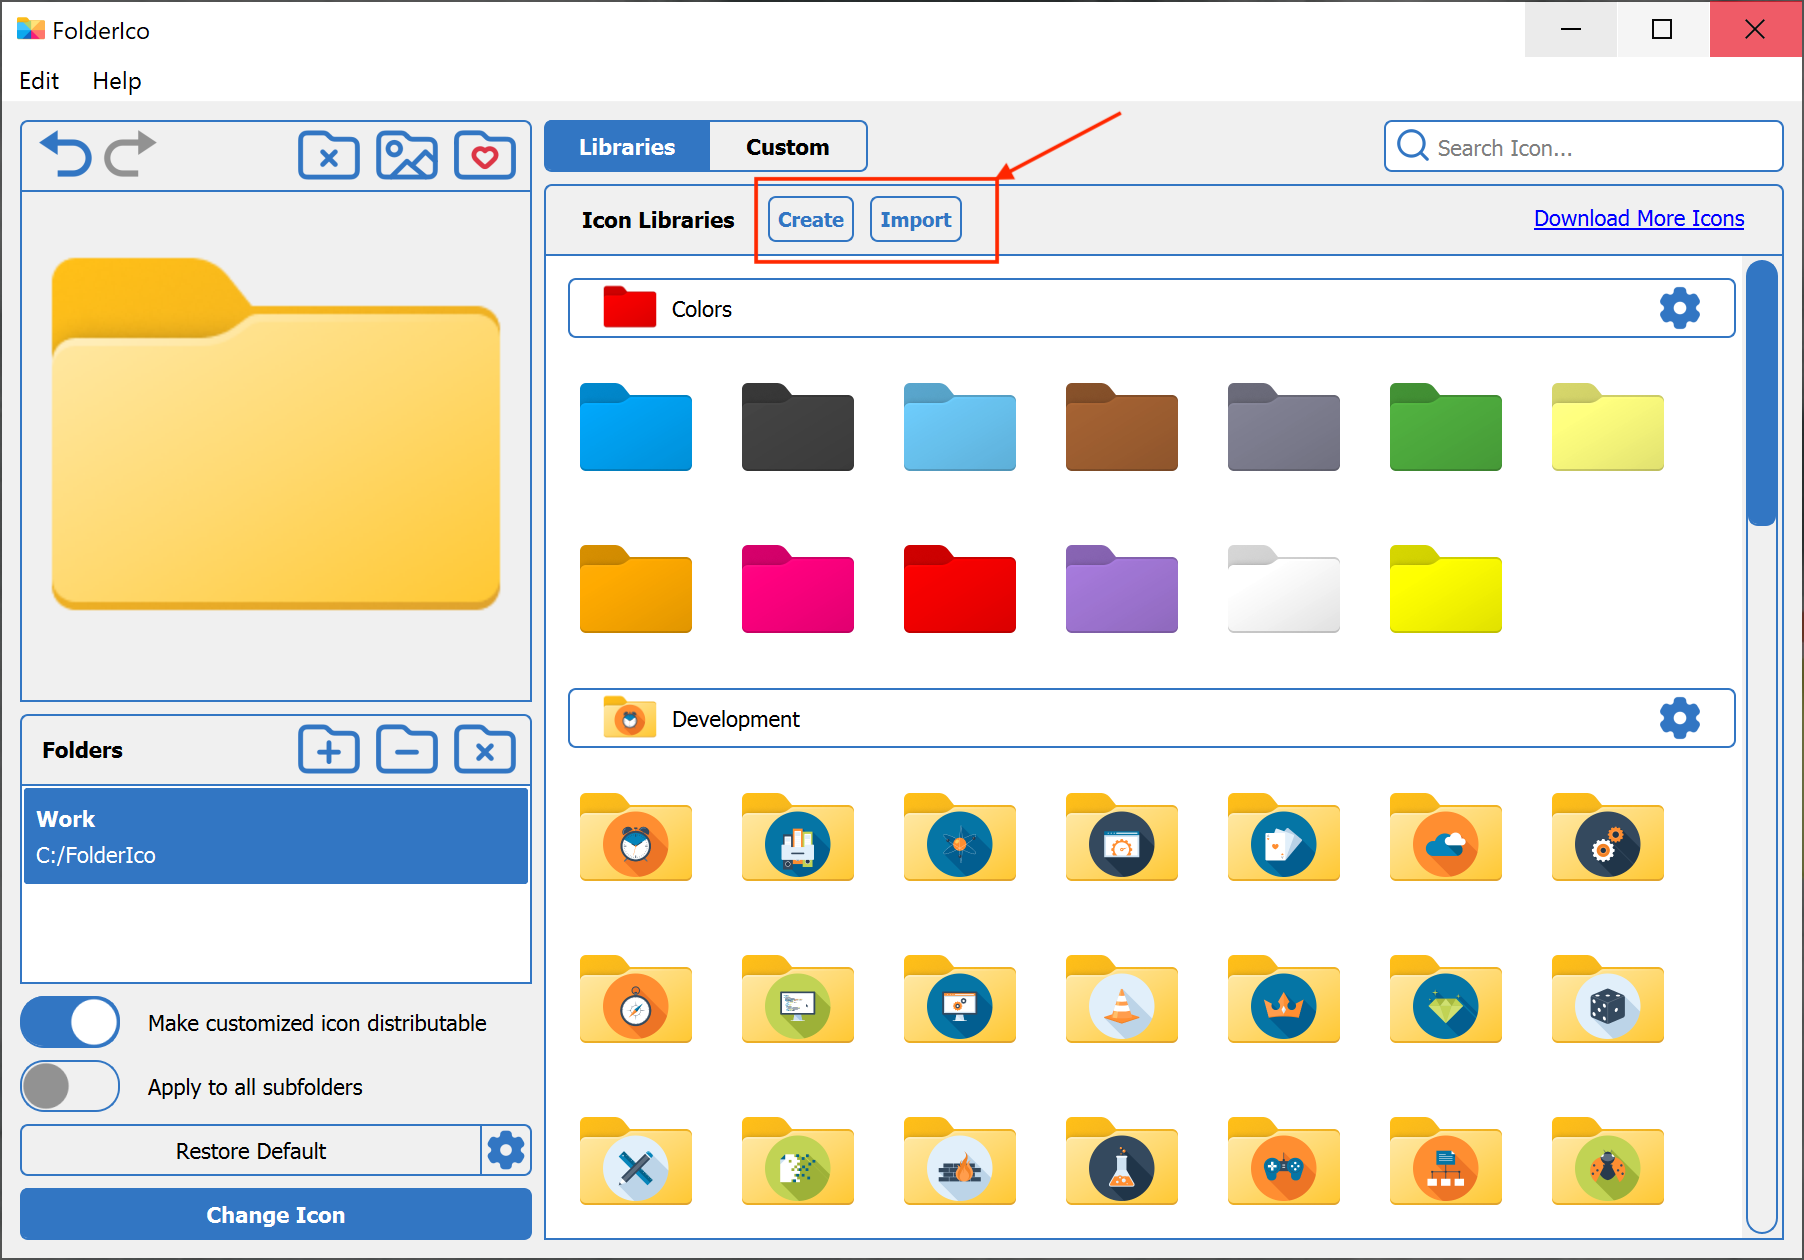
Create or import an icon library
Click the Import or Create buttons in the header section. Once a library is created or imported, you can add custom images to it.
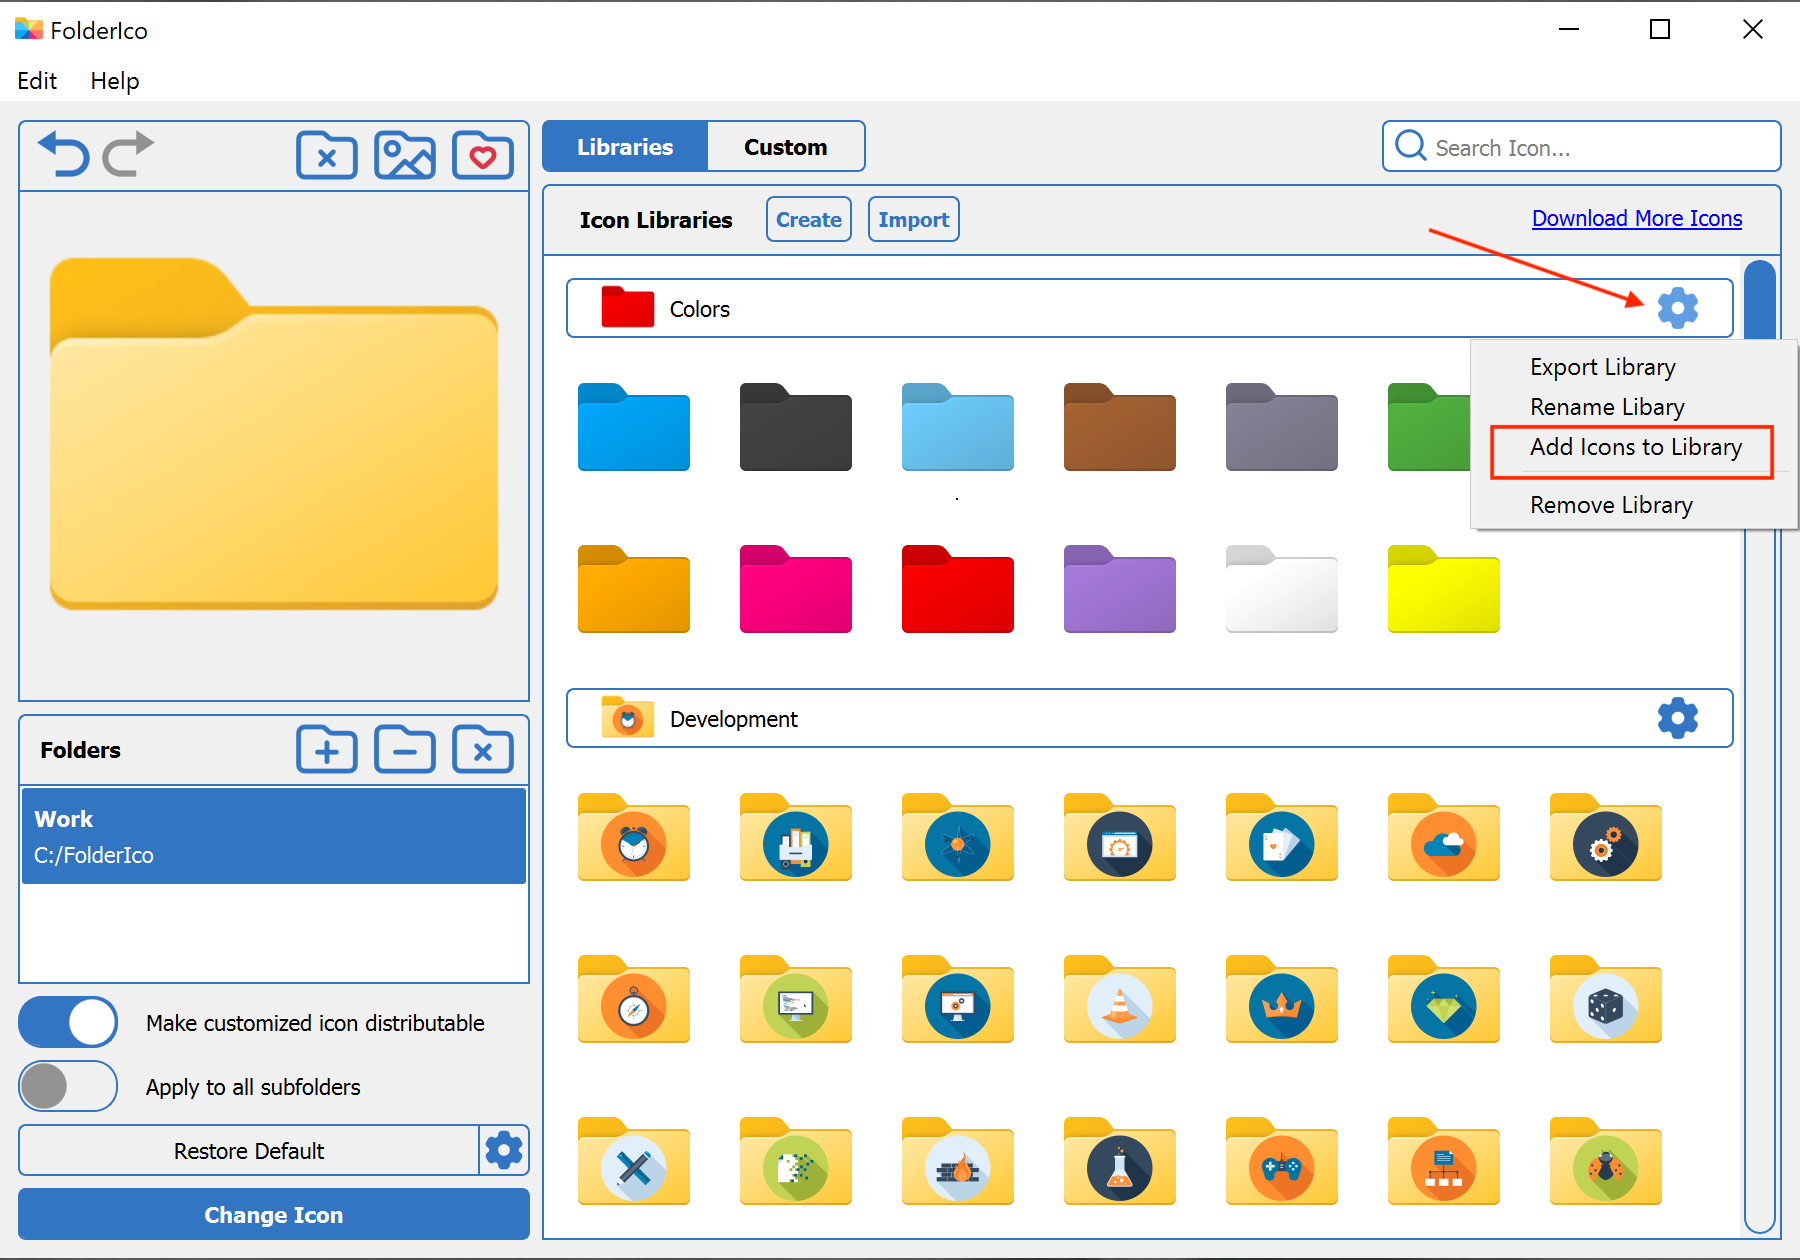
Add icons to an existing library
Choose an existing library and click Add Icons To Library to select your desired image. FolderIco supports multiple image formats and will automatically convert them into ICO format.
Step 3: Edit the context menu
To modify the FolderIco right-click menu:
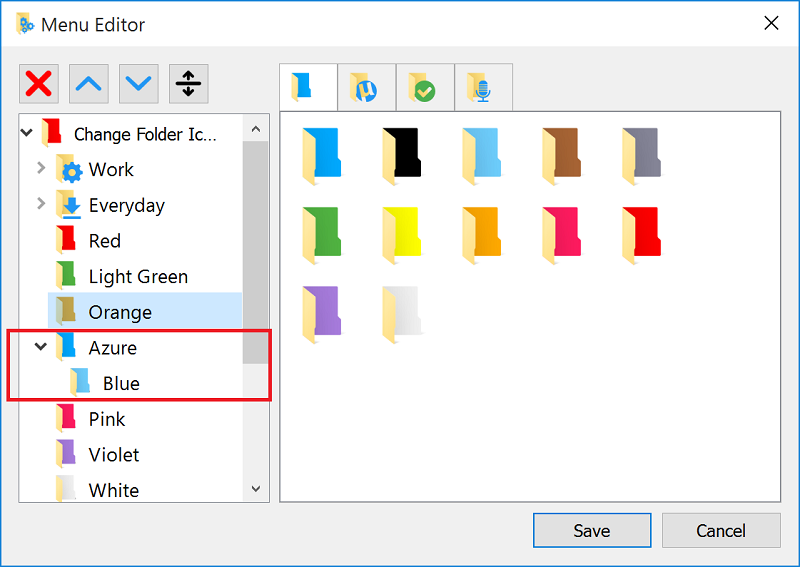
- Navigate to Edit -> Menu Editor.
- The left panel displays the current context menu structure, while the right panel lists all available icons.
Rename icons
Double-click an existing icon and enter a new name.

Create categories
Drag one icon over another to group them under a new category.
Add a new icon
Drag an icon from the right panel and place it where you want it in the menu.
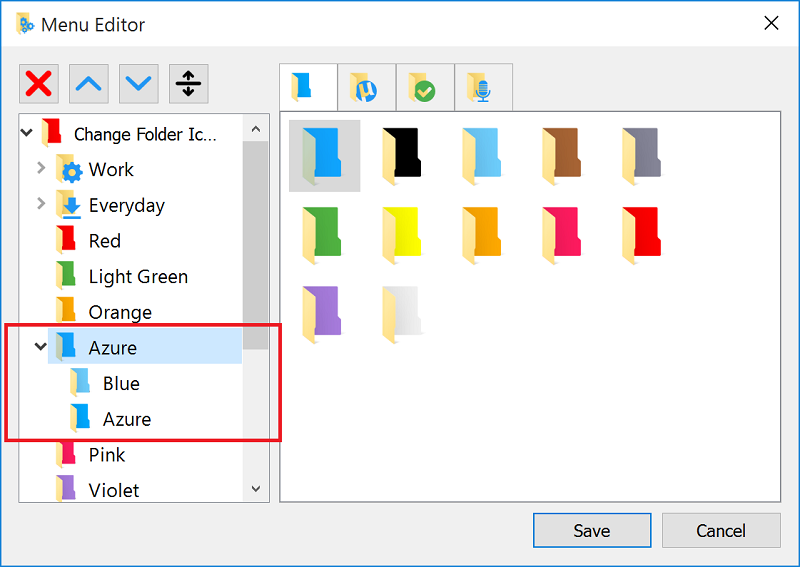
Manage menu items
Use the upper buttons to delete, reorder, or add dividers between menu items.
Step 4: Save and apply changes
Once you have customized the menu, click Save to store your modifications.
Your personalized FolderIco menu is now ready. Enjoy a more organized and visually appealing folder structure tailored to your needs.